

Hi Everyone, it's me, owner Sandy, and I have some BIG News and a 2016 Free New Years Printable Gift as well as past Christmas Printables you can grab now if you missed them in the past. The Big News is sadly after January 2/16 our online www.craftyvintagegirl.com Store will only sell digital items as all remaining stock will be sent to a buyer(s). I will post details ASAP but if you wish to stock up we have 25% off every item at checkout and FREE Shipping on orders over $25.00!

Now that I've moved it's become too difficult to warehouse stock in the USA when I live in Canada. Plus I will be losing my amazing USA shipper Lyssa who has been an invaluable help! Lyssa was so swamped at her new job orders got behind and we apologize - but she's caught up and can fill any new orders placed up till Jan 2/16.
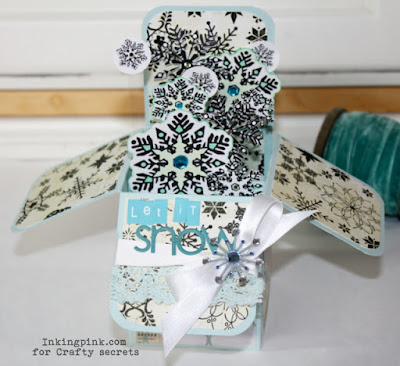
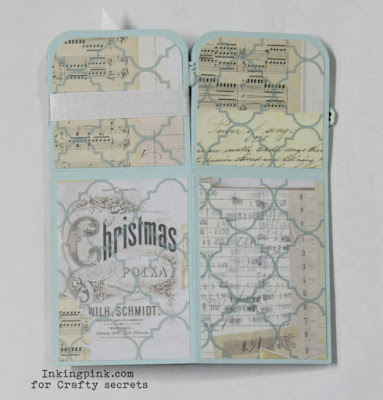
The Digital Store will likely move to Etsy, so I'm very sad to say our fantastic and talented Design Team will be closing down as well. DT Leader Kathy Clement has worked so hard at running the Blog and she
and the DT ladies have created 1,000's of beautiful and inspiring
samples over the years! Kathy recently created this cool layered card using our Vintage Christmas CD .

Here's a new sample by DT Member Michele Kovack who has been on the Design Team for so many years she has posted over 370 beautiful Crafty Secrets projects! Michele used an image from our Retro Christmas Digital Cuts on this sweet ornament.

Many ladies on the Design Team will also be starting on new and exciting adventures and I'm so immensely grateful to all of them (present and past DT members) and wish each of them the very best! You can also see photos and links to all their inspiring samples just by scrolling through this Blog over the past years but huge thanks to the current and talented members Sheila Rumney, Diane Hover, Ginny Nemchack , and Shantaie Fowler!
Congratulations to our December Linky Winner Heather who posted a couple of samples including this adorable Christmas treat bag using an image from our Retro Christmas Cuts. Big thanks to all the participants for joining in!

Here's a NEW 2016 New Years Printable Gift for you. I didn't add the year so it can be used again and even cropped to create a card or tag for any occasion! Just left click to get it as large as possible and right click on it to save. All our Free Printable are for personal use only please.


This Christmas postcard was our free gift in 2013


Here's a 3D sample I made and added some snow and glitter.

This fun Christmas Rebus Game has been a hit over the years. Just print copies off and try and guess all the names of the Christmas carols on your own or divided into groups.

Here's the answers for the game above.

We sold our big house after 21 years, moved my mum into a wonderful apartment by the beach and we bought a townhouse that we love so much I don't even miss the big house a bit.

I will be back with all the details once I know who is buying all the stock for sure. Please contact me at craftysecrets@telus.net if you are interested in buying cases of any printed stock or remaining Clear Stamp Sets.
Thank you to both old and new readers for your support I want to wish you all love, peace and a joyful Christmas and the most wonderful year ahead in 2016!
Owner
Crafty Secrets
Visit
Our Online Store
www.craftyvintagegirl.com
See
Our Blog for Ideas, News & Giveaways!
Toll
Free Ph or Fx 1-888 597-8898
Head
Office
14877
58 Avenue
Unit
86
Surrey
BC V3S 8Y9
USA Mail
250 H.
Street, # 436
Blaine,
WA 98230


